
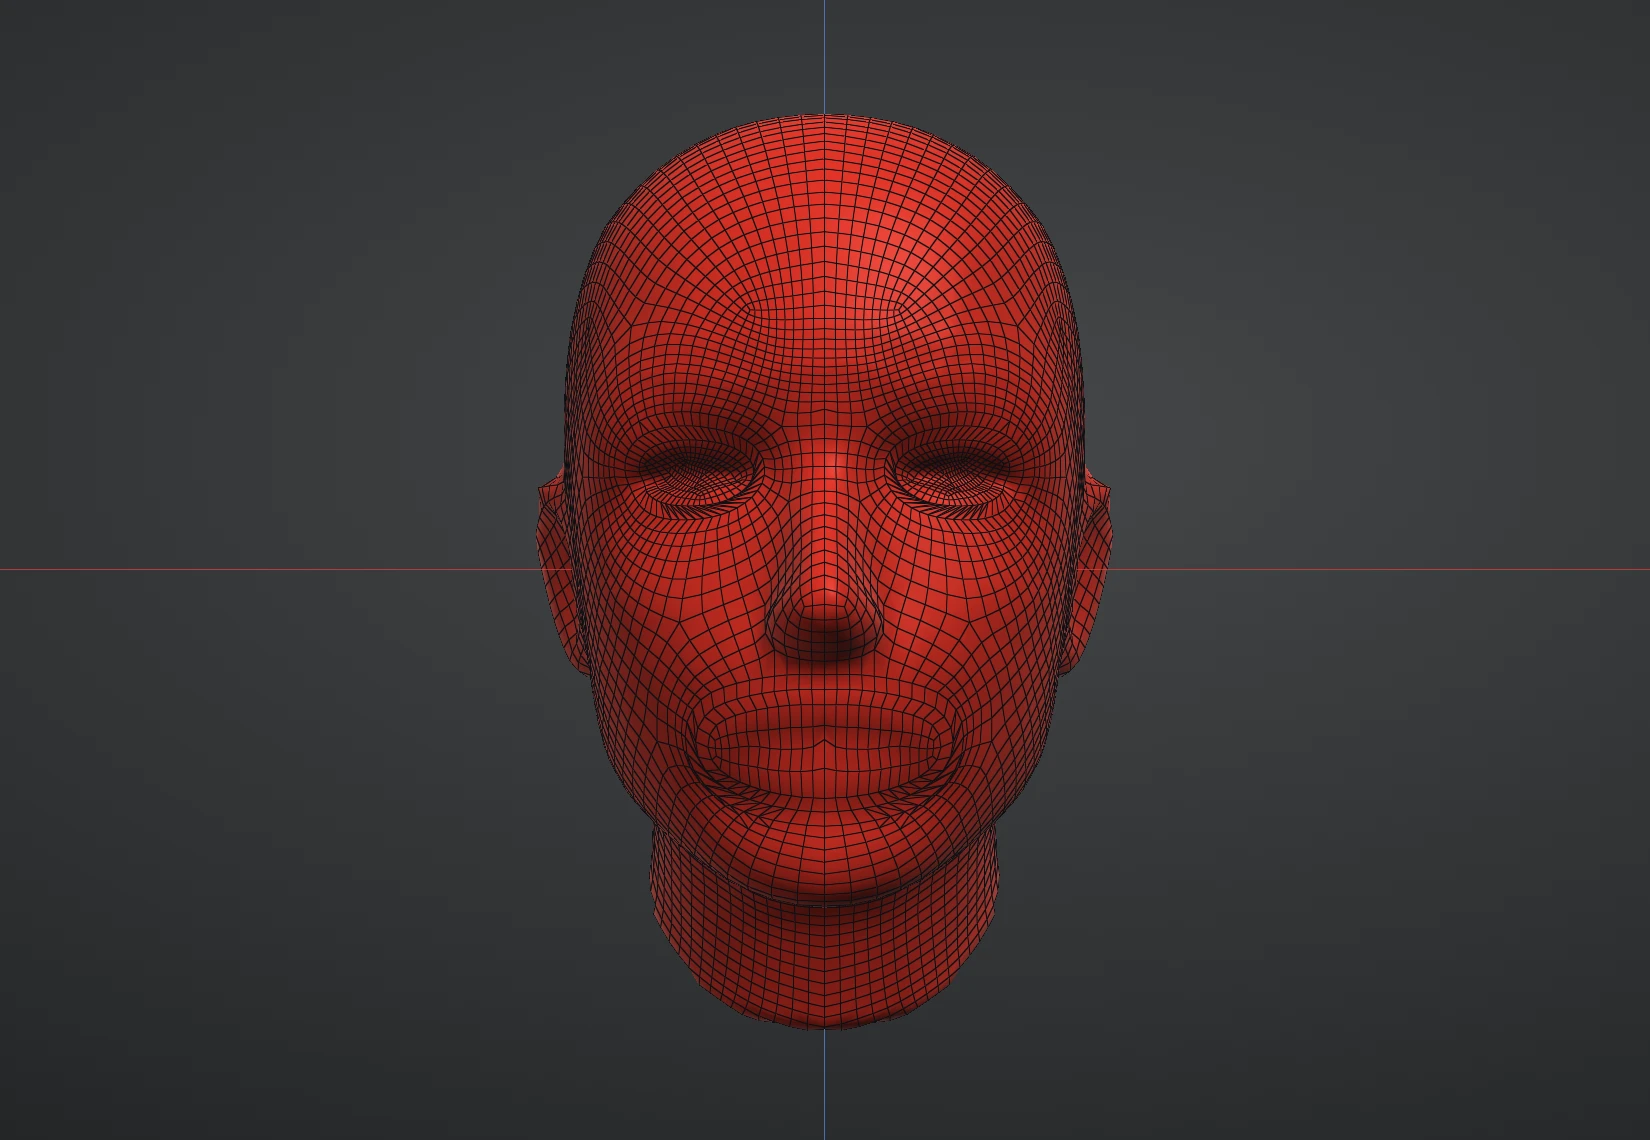
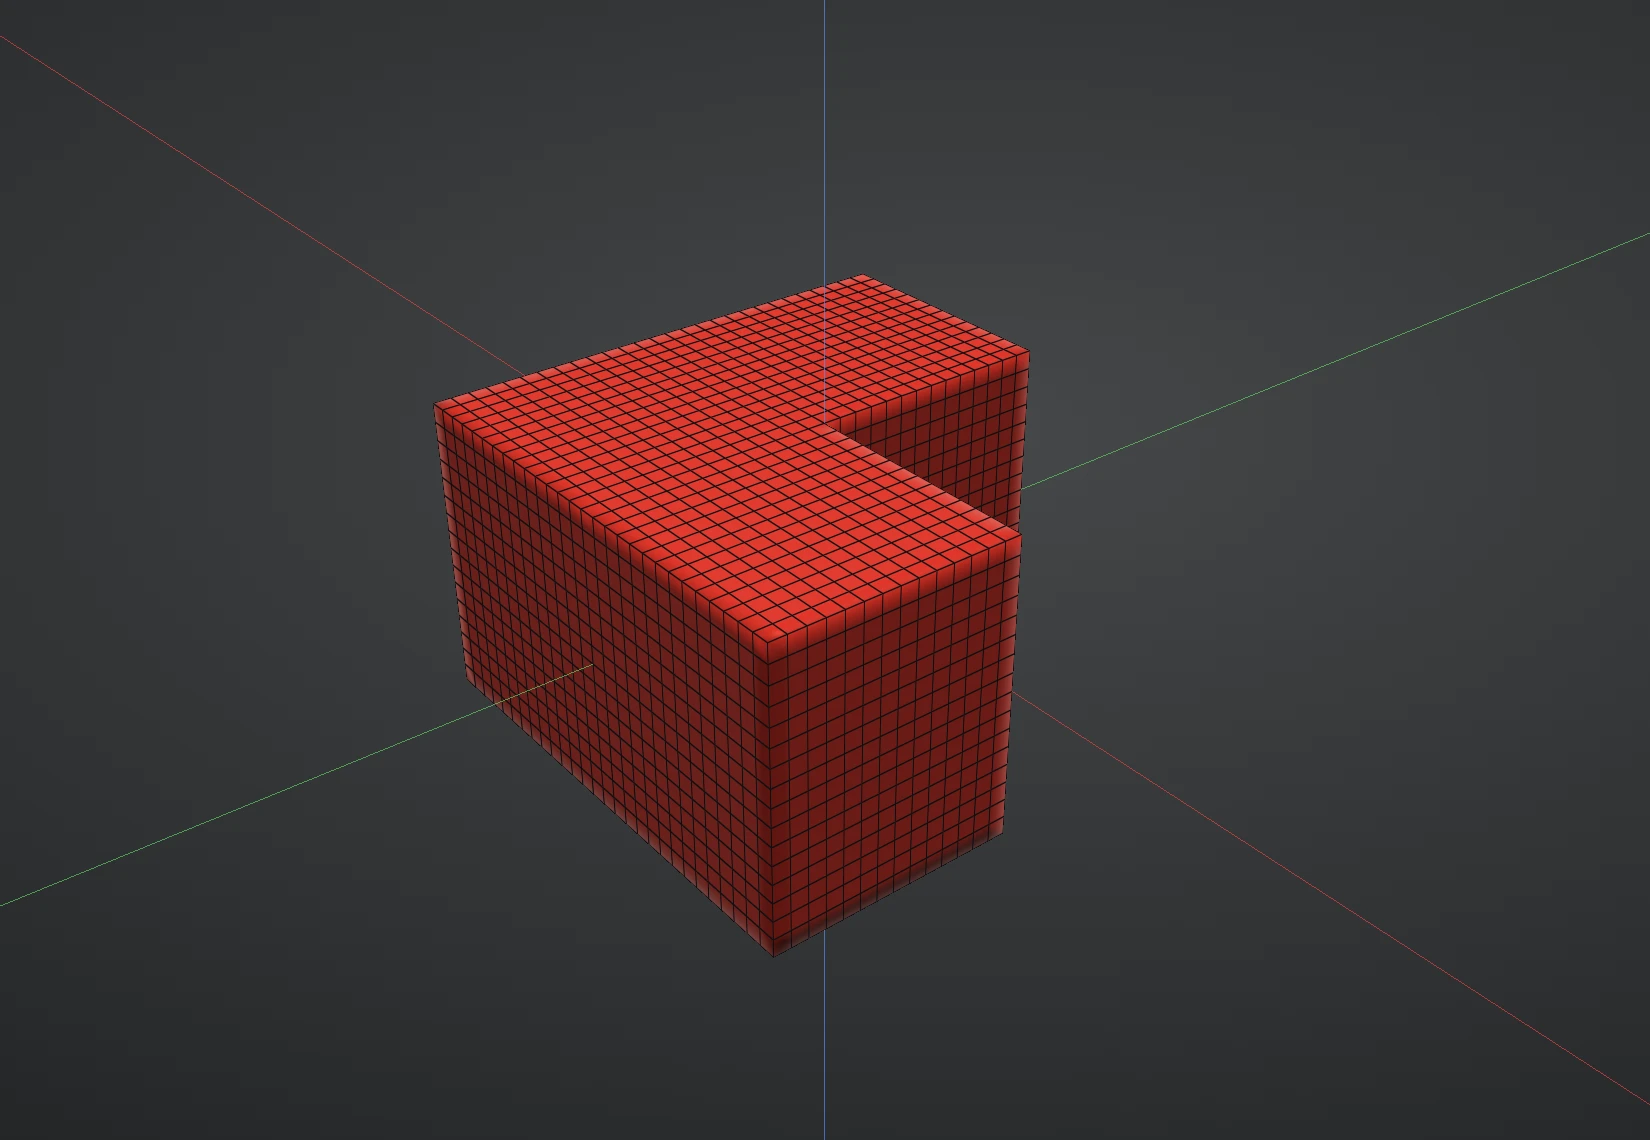
A sculpt is made of millions of small triangles in no particular order. That is right for sculpting and wrong for almost everything that comes after it: a game model, a rig, an animation all want a light mesh of four-sided faces whose rows run along the forms. Reflow makes that mesh for you. It lays clean quads over the active layer, following the shape, and puts the result on a new layer beside your sculpt.
Entering Reflow
Click the Reflow tool on the left rail, under Blockout. The Brush section steps aside and the Reflow section takes its place. Any other tool on the rail, or a brush from the picker, leaves Reflow again.
While Reflow is the tool, the left mouse button draws guides or paints density instead of sculpting. Orbit, pan and zoom work as usual.
The controls
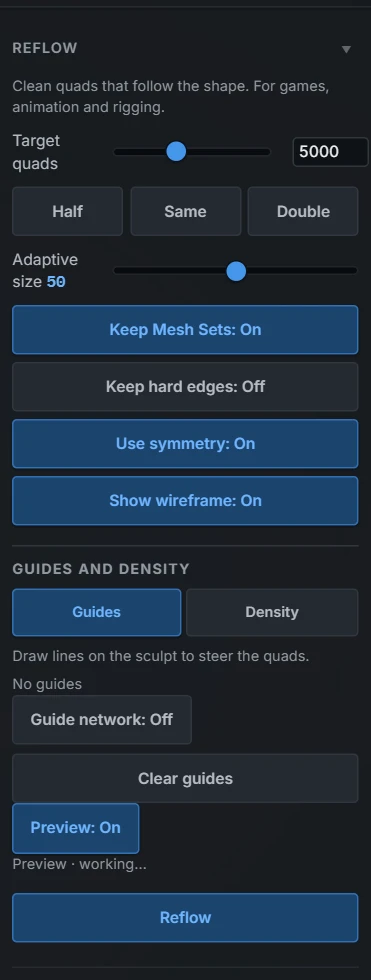
- Target quads — about how many quads the new mesh has, from 500 to 200,000. Drag the slider or type a number. The result lands within a few percent of it.
- Half, Same, Double — set the target from the layer you are on: half as many faces as it has now, the same number, or twice as many.
- Smoothness — how much the quads are smoothed over the sculpt at the end. 0 leaves them where the rows put them, 50 is the usual amount, 100 twice that. Less keeps sharp detail, more gives evener quads.
- Adaptive size — how much the quads change size with the shape. At 0 they are all the same size. Higher values make them smaller where the surface bends tightly and larger where it is flat. Up to 50 only their size changes; above 50 rows are added and ended to follow the detail, which adds irregular points.
- Keep Mesh Sets — rows of quads run along the borders between the layer's Mesh Sets, and the new layer keeps the sets.
- Keep hard edges — rows of quads run along sharp edges, so corners stay crisp. Edge angle says how sharp an edge must be to count.
- Use symmetry — the quads are laid on one side and mirrored across the model's symmetry planes, so both sides match exactly. It is on by default when the model's symmetry is on.
- Show wireframe — draws the quads' edges over the result when it arrives.
Guides
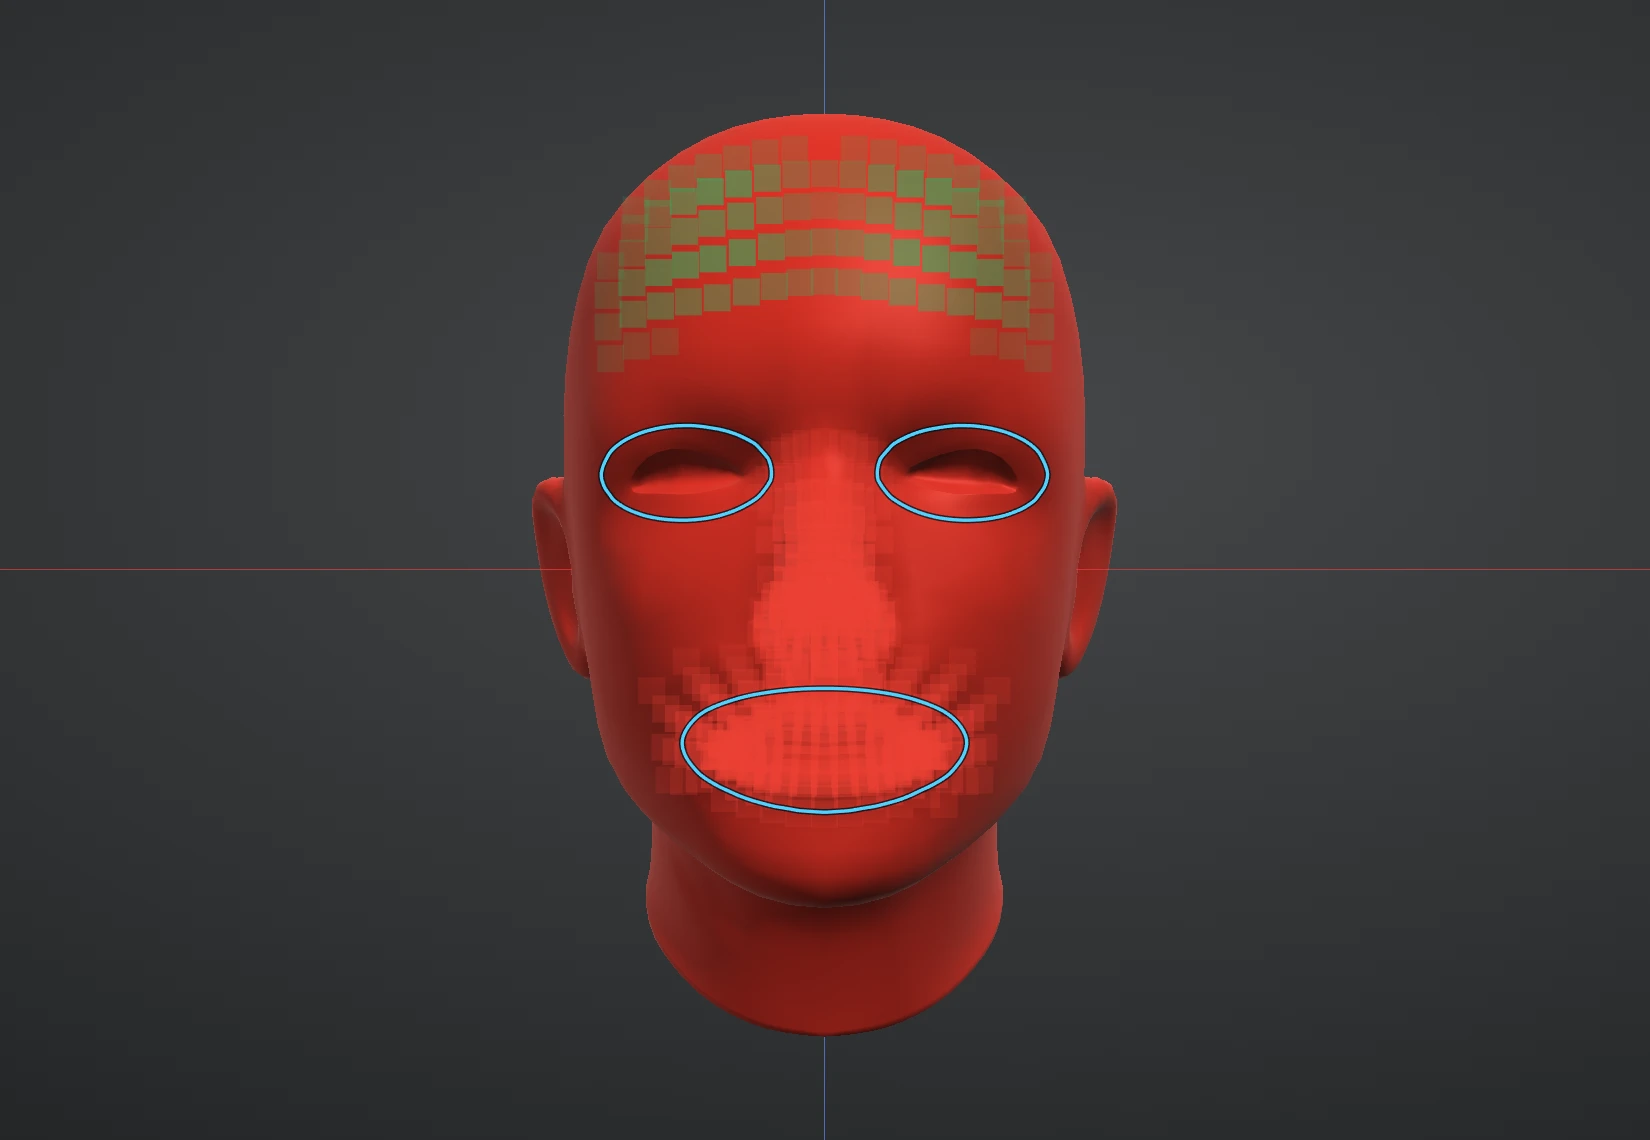
A guide is a curve you draw on the sculpt that a row of quads must follow: the rim of an eye, the line of a mouth, the edge of an armour plate.
With Guides chosen:
- Draw it. Press on the sculpt and drag, as you would with a brush: the line appears under the pen as you go. Let go and the stroke becomes a guide: a plain, smoothed line on the sculpt. End the stroke where it started to close it into a loop. Start or end it beside the end of another open guide and the two join there.
- Or place it point by point. Click the sculpt to place points; the curve runs smoothly through them. Press Enter to finish the guide, or click its first point again to close it into a loop.
- Backspace takes the last point back while you are placing. Esc cancels the guide, and drops a stroke you are still drawing.
- Click a guide to select it; it is drawn brighter and shows its points as small squares. Drag a square to reshape the guide; dropped near a yellow point of the preview, it snaps onto it. Press Delete, or use Delete guide, to remove the guide.
- Clear guides removes every guide from the layer.
Guides are drawn in light blue with square points, so they stand apart from everything else in the view. They belong to the layer they were drawn on and are saved with the project.
What a guide does to the quads:
- A guide becomes a row of edges: the quads line up along it.
- A closed guide becomes a clean loop of edges, with a ring of quads running round it on the inside and another on the outside. The irregular points the loop needs sit in the middle of the loop and well outside it, not on it. For that the loop has to be about five quads across or more at your Target; a smaller loop is still followed, without the rings, and the panel says it is too small for a ring. Raise Target quads, or draw the loop larger.
- A loop is rounded a little where it turns more tightly than the quads can follow.
- With Use symmetry on, a guide drawn on one side is mirrored. A guide that crosses the centre line, or ends beside it, is made the same on both sides, and meets the centre line squarely.
- A guide that cannot be followed is left out, and you are told which: the panel names it (guides are counted from the first one drawn) and it turns purple on the sculpt until you change the guides or run Reflow again. The other guides are still followed.
Guide network
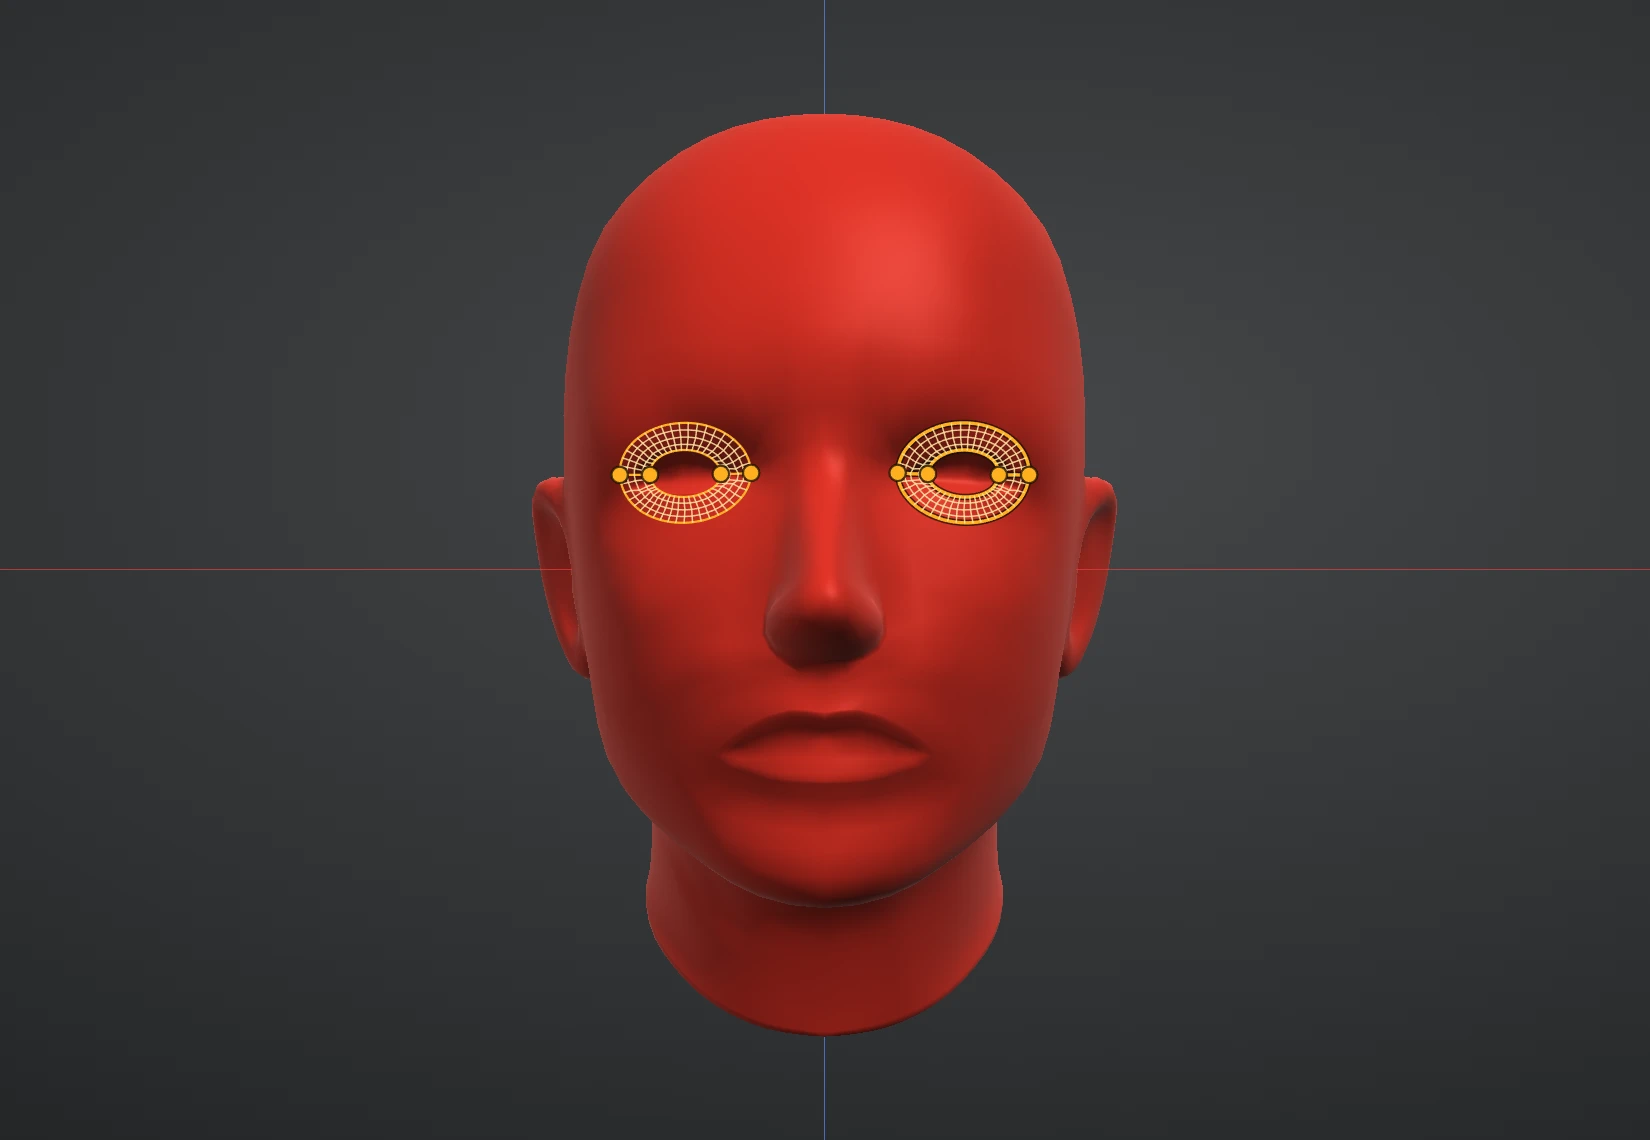
Guide network (under the guide count, off by default) reads the guides as a network:
- Where two lines cross, or one ends on another, there is a square. Drag a square to move the crossing; the lines bend to follow.
- A region the lines close off with three, four or five corners gets its grid at once, drawn thin on the sculpt. Four corners give a plain grid; three or five give the standard grid with one irregular point in the middle, shown as a yellow ball. Neighbouring grids agree on the rows along the line they share.
- Draw a line through a grid to split it. Click a part of a line between two squares to select it, and Delete removes just that part.
- A loop with no square, and a region with two corners or more than five, shows no grid: Reflow fills it.
- When you press Reflow the grids are laid as they are shown and the rest of the surface is filled round them. If the grids cannot be laid on the shape, the lines are followed as plain guides and the panel says so.
- Off, every line is a plain guide again; nothing is lost. The setting belongs to the layer and is saved with the project.
Density
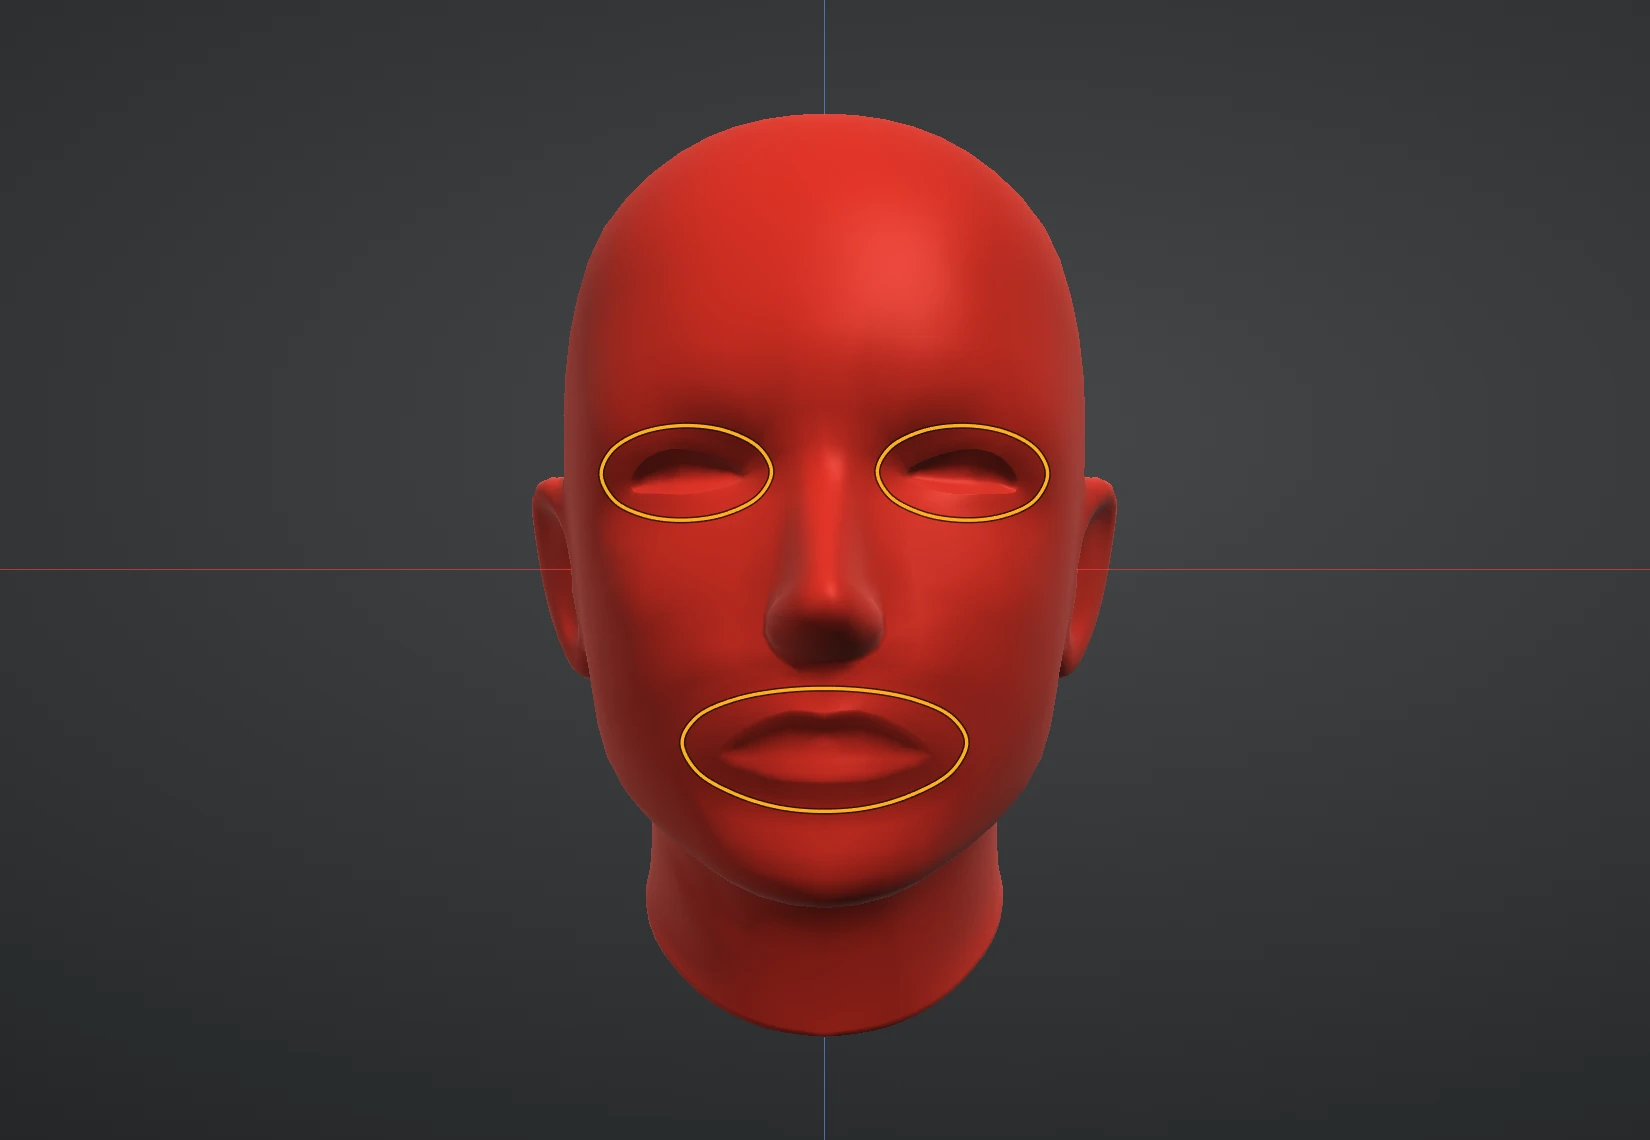
With Density chosen, the brush paints where you want more quads or fewer:
- Drag to ask for more quads. The area turns red.
- Ctrl+drag to ask for fewer. The area turns green.
- Shift+drag smooths what is painted.
- Brush size sets the radius. Clear density goes back to the same density everywhere.
Density is its own channel. Painting it does not touch the mask or the paint colours, and it follows the model's symmetry. It belongs to the layer and is saved with the project. If the layer's point count changes afterwards (a Subdivide, a Remesh), the painted density no longer fits and is cleared.
Live preview
While the preview works, a progress card over the viewport and a thin bar under the Preview switch show what it is doing: reading the sculpt, working out the flow, laying the rows, settling the quads. They go away when the quads are drawn.
With Preview: On (the default) the quads Reflow would make are drawn over the sculpt as soon as the tool opens, and again whenever you draw or change a guide, paint density or change a setting: the edges of the quads, and a yellow ball on every irregular point. The line above the Reflow button gives the preview's counts. On a heavy layer the preview is worked out on a light copy of it, and the Reflow button then makes exactly the quads the preview shows, laid onto the sculpt itself. Above 30,000 quads the preview pauses. Preview: Off hides it.
Moving the yellow points
Each yellow ball is an irregular point: a place where three or five quads meet instead of four. Reflow decides where they go, and you can move them:
- Drag a yellow ball to where you want that point and let go. The preview is laid again with the point there, and the quads away from the move stay as they were. A moved point wears a white ring.
- Drag it again to move it further. Click it and press Delete to let Reflow place it itself again; Clear pins does that for every moved point on the layer.
- A point cannot be put on a guide, a hard edge, a Mesh Set border or an open border; the line under the Preview switch says when a pin could not be held, and a purple ring marks where it was asked for.
- With Use symmetry on, a point moved on one side moves with its mirror image.
- Moved points belong to the layer, are saved with the project, and undo with Ctrl+Z.
Running it
Press Reflow. A progress card names each step and has a Cancel button; Cancel stops the work and changes nothing.
When it finishes:
- The result is a new layer named after the one you started from, for example Layer 1 – Reflow. It becomes the active layer.
- The layer you started from is hidden, not changed and not deleted. Click its eye in Layers to see it again.
- You are taken back to the sculpting brush, with the brush you last held, ready to work on the new layer.
- A message gives the counts: how many quads were made and how many irregular points there are (points where three, or five or more, quads meet instead of four). Open the Reflow tool again on that layer and the same line is under the Reflow button; hover it for the breakdown. If something did not go as asked (a guide that could not be followed, a simpler layout), one short line in the warning colour says so, and its tooltip explains.
- One Undo takes the whole Reflow back.
You can change a setting, switch back to the sculpt's layer and run Reflow again as often as you like. Each run makes its own layer. When only the guides changed since the last run on that layer, the quads away from the guides you changed stay where they were; Shift+click Reflow to lay everything out afresh. A cancelled Reflow, or one that could not finish, leaves you in the Reflow tool with nothing changed.
Dense sculpts
A sculpt of many millions of triangles is first made lighter inside Reflow, and the quads are laid out on that lighter copy. The panel says so when it happens. This is automatic and has nothing to do with the Remesh section: none of its settings are read or changed. Reflow reads layers of up to 25 million triangles; above that, step down a subdivision level first.
With Live Topology on, Reflow switches it off first, as every other whole-mesh action does.
Getting the detail back: Reproject
A Reflow result is light, so it carries the big forms of the sculpt and not its fine detail. To bring the detail back, press Subdivide ↑ on the Reflow layer as many times as you need, then Reproject in the Topology section. Reproject pulls every point of the active layer onto the closest point of the other visible layers. On a Reflow layer with nothing else showing, it uses the sculpt the layer was made from, hidden as it is. Masked areas stay where they are, and one Undo takes it back. Reproject distance, the slider below it, is how far Reproject may move a point, as a percentage of the layer's size: a point whose nearest surface is farther away stays where it is, so parts with nothing under them are left alone. 100% moves every point, however far. The quads are not changed, only moved, so the layer still exports quads.
Reproject works on any layer, not only a Reflow result: it wraps the layer you are on over whatever other layers are visible.
Exporting quads
OBJ and FBX exports of a Reflow layer write real four-sided faces, so the mesh arrives in other software as the quads you see here. GLB and STL are triangle formats and stay triangles. Every other layer exports exactly as before.
A Reflow layer keeps its quads for as long as its topology is the one Reflow made. You can sculpt on it and it still exports quads. If you subdivide it, remesh it or cut it, it becomes an ordinary layer and exports triangles.
Tips
- Start low. Five thousand quads is plenty to judge the flow; raise the target once the rows run where you want them.
- Put guides where a loop matters most: around the eyes and the mouth, along a hard edge you want a row to sit on.
- Split a model into Mesh Sets by part and keep Keep Mesh Sets on to get a row of edges along every border.
- A lower irregular-point count is not always better. A hand needs them between the fingers; what matters is that they sit where the surface is calm.