
A layer in Re:Form is a separate mesh — its own geometry you can sculpt, move and transform independently of everything else in the scene. A character is a body layer plus eye layers plus tooth layers; a prop is a handle plus a blade. Layers are how multi-part things stay manageable.
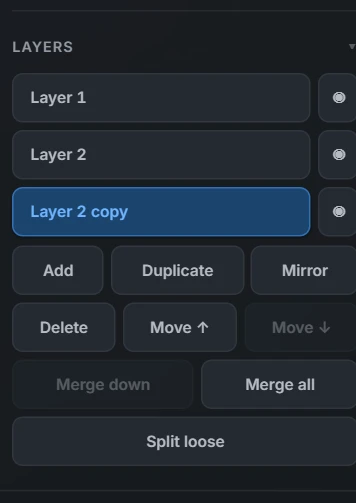
Click a layer in the list to make it active — brushes and transform tools work on the active layer only. Each layer has a visibility toggle, and double-clicking its name renames it.
The actions
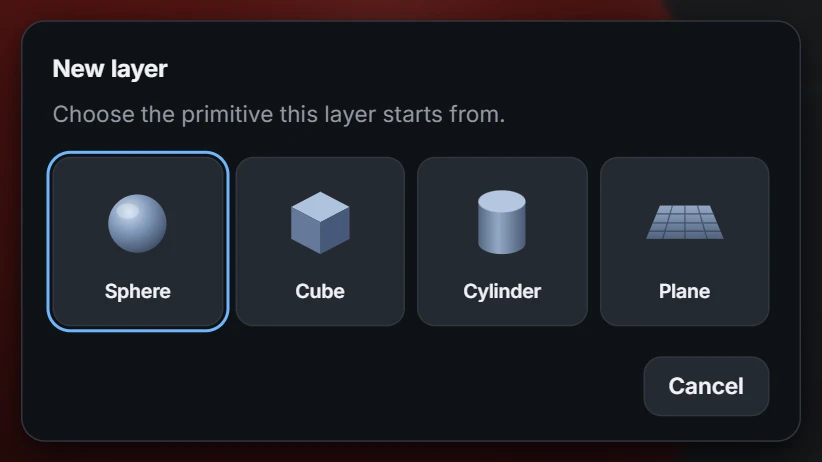
- Add — a new layer, starting from a primitive of your choice: Sphere, Cube, Cylinder or Plane.
- Duplicate — an exact, independent copy of the active layer.
- Mirror — flip the active layer across the X axis, in place. For the classic "second eye" move: Duplicate first, then Mirror — you get a mirrored copy on the other side.
- Delete — remove the active layer.
- Move ↑ / Move ↓ — reorder the list. This is list organisation only; it never changes the sculpt.
- Merge down — merge the active layer into the layer directly below it; the two become one mesh.
- Merge all — merge every visible layer into a single mesh. Do this before remeshing an assembly into one continuous solid — or before exporting for print.
- Split loose — the reverse of merging: split the active layer into its disconnected pieces, each becoming its own layer. Invaluable right after importing a model that arrives as one object but is really several parts.
Working across layers
- Sculpting only ever touches the active layer — a brush stroke can't accidentally drag a neighbouring layer's surface, which is precisely why eyes go on their own layer.
- The transform gizmo poses layers independently, each around its own movable origin point.
- Subdivision is per-layer too: spend triangles on the face, not the teeth.
✦
Layers, their names, their order and their sculpt state all save into the .clay project file. When you want a whole assembly in a single exported mesh, Merge all first, then export.